-
Showing posts with label distressed finish. Show all posts

1/12/13

Cottage Style ~ Ladderback Chair Makeover


Over the years my personal style has developed and matured into a definite Cottage Style.  I don't know if it's the reminiscence of summer getaways to sunny Pacific beaches, or the natural ease and comfort that is an innate quality of Cottage Style.  


Cottage Style can be a combination of many other decor styles.   

What you are likely to find in a Cottage Style home are rooms with muted blues, greens and neutrals combined with lots of white.  You might find chippy painted furniture or industrial pieces that have been re-purposed.  Design elements can be whimsical and functional, like interesting collected items displayed alongside everyday dishes on open shelving in the kitchen.

My Cottage Style is:  
  • Light, bright and cheerful.
  • Chippy and worn by default.   
  • Put your feet up comfortable.   
  • Unconcerned with a bit of clutter from everyday living. 
  • A place where kids can play without worrying they'll ruin anything. 

Cottage Style allows me to add my personality to my space without spending a lot of money.  By taking acquired items and re-purposing them or giving them new life with a bit of paint or elbow grease.  

Like this ladder back chair...


Found on the side of the road with a "FREE" sign when the neighbors were moving.  Never one to pass up a good freebie, it came home with me.

After hanging out for a bit with no real purpose (only a year or so) it finally spoke to me and I knew what I needed to do to give it some cottage personality.


A couple coats of crisp white paint on all surfaces except the rush seat.


A bit of distressing with my sanding sponge.  

Some green acrylic paint mixed with some Glazing liquid (1/1 ratio).

I taped off the bottom of each leg and painted them with the green paint/glaze mixture.


I also painted one of the bars on the chair back green.  Just for fun!  Once they'd dried completely, I gave the green sections another quick distressing with the sanding sponge.


Here it is all chippy white...


Just a touch of flirty green...


It fits in perfectly with my well-worn, comfortable, cottage style.  Like a dear old friend.


Want to see more Cottage Style DIY projects?  
You can visit my Project Gallery HERE.

What is your decorating style?  I'd love to hear about it.

Thanks for stopping by!
Sherry 


Sharing with:
http://www.lizmarieblog.com
http://www.funkyjunkinteriors.net
http://www.ishouldbemoppingthefloor.com/
http://diyshowoff.com
http://www.iheartnaptime.net/
http://www.linesacross.com/
http://www.sewcando.com/
http://www.watchoutmartha.net/
http://www.sumossweetstuff.com/
http://www.craft-o-maniac.com/
http://betweennapsontheporch.net
http://makingtheworldcuter.com
http://www.apinchofjoy.com/
http://www.the-chicken-chick.com
http://www.settingforfour.com/2013/01/its-party-time-1-13-2013-linky-party.html
http://cupcakesandcrinoline.com
http://itssoverycheri.com/2013/01/13/its-party-time-1-13-2013/
http://threemangoseeds.blogspot.com
http://www.alderberryhill.com
http://myuncommonsliceofsuburbia.com
http://www.homestoriesatoz.com
http://twelveoeight.blogspot.com
http://www.savvysouthernstyle.net
http://frenchcountrycottage.blogspot.com
http://jedandivy.blogspot.com
http://www.nutmegplace.com/
http://shabbynest.blogspot.com
http://chiconashoestringdecorating.blogspot.com/
http://romantichome.blogspot.com/
http://www.sixsistersstuff.com
http://thefrugalgirls.com/2013/01/food-link-parties.html


Image Map
Continue Reading ...

10/7/12

Welcome to Inspiration Cafe ~ Distressed Donna Down Home

Natalie - NorthShore Days


I am so excited to be invited as guest host here at The Inspiration Cafe.  I have been following them for a while and love their Monday features. 

I am Distressed Donna Down Home.  I am a retired middle school English teacher.  I haul and refinish rusty, crusty stuff to resell in my booth at a local antiques mall.  I started blogging back in April and have written at the speed of light ever since.

My posts are as scattered with ideas and projects as my brain is.  I love photos, but am chronically bad at taking them.


Hang onto your coffee cups or iced sweet tea.  It's going to be a bumpy ride!

For this post I chose three unsuspecting little benches.  I love to stack these in vignettes.  I have chosen a bird theme for these and some painting and some distressing and some stenciling and some stamping and some torn cotton and some tags.

Well, you'll see - I just go too far sometimes.
I bought some sample pots of Valspar in (from the left) Summer Sky, Rain, and Prairie.

Very close in shades of blue-gray.  They turned out beautifully and most would stop here.

Not me!
 I hopped over to The Graphics Fairy and chose a nest for the round bench, a dove for the small bench, and two black and white images - a bird and a nest - for the large bench.

On the two colored images, I used the regular Mod Podge method.  Thin coat on the back of the image and placed carefully on the surface and let dry.


 On the large blue bench I decided on the placement of the bird and the nest.  I carefully cut the images out so that there was just a small border of the white paper.  When you are placing the image, remember you will be reversing it so it will actually be on the opposite side.
I put a coat of Mod Podge on the top of the bench and placed the images face down.  After gently smoothing them out, I let them dry overnight.

The next morning I wet the back of the image with water. When the paper soaks up the water, you gently rub the paper backing to release it from the ink.

This takes practice!!!
 Here the bird image is revealed with the nest yet to go.

The results are really worth the effort.  If you mess up, you can:
A.  Leave it and say it was on purpose.
B.  Sand it off and start again.
Finished - finally.  After rubbing the image off, let it dry and then sand with a cheap rough paper towel or a knee-high stocking or if you are fancy, super-fine sand paper.

If you would like, you may go commit a crime - you have probably rubbed your fingerprint off!

 Yes, I know, most would be happy and stop here.

Not me!

I took the benches outside and gave them a distressing using a heavy grit sanding block followed by a fine grit one.

The round bench got a heavy distressing.


The small one got a medium distressing.
 And the large bench got a light distressing around the edges.


Most would stop here.

Not me!
This next part is  Danni's favorite thing to do!

STENCILING!!!

I decided the round bench with the nest needed a bird on either side of the legs.

First stencil in Folk Art Barnwood.

Move the stencil about an eighth of an inch to the upper right.

Stencil the bird in Sea Mist and the leaves in Clover.

Using a fine liner brush and Linen paint lightly create highlights where natural light would hit the object.

I also gave some details to the bird and the leaves to make them pop.

The small bench did not need much extra - the distressing really brought out all the different coats of paint it had endured during its life.

The name of this print is "A Dove At Sea" so guess what?  I pulled out my stamps and put the title on it!
I thought of something special for the big bench - a skirt!

I love tearing up cotton calico.  I purchased this fabric because it went with all three benches.  My sewing machine is hiding somewhere in the house so after ripping and fraying one edge, I ironed down an inch.  Using Peel 'n Stick tape, I taped that down.  Simply slip a piece of elastic through there  and you have a skirt for your bench that can be removed when necessary.


 Here it is a skirt for a bench!

 Most would be happy and stop now.

Not me!


I made a small copy of the black and white nest, colored with with pencils, Mod Podged it to a distressed blue shipping tag, made a torn cotton tassel, and attached them to the skirt.

Whew!

All three benches received three coats of satin varnish - I forgot that step somewhere along the way.


Most people would be happy and stop here.

And I am definitely happy!


THE BIG REVEAL


 Baby bench in blue with a dove.


 The round bench in summer sky paint with stenciled birds.

What's that I see?

I know I said I was happy, but I could not resist adding a nest of eggs underneath.


The shy bench with a skirt covering her legs.

If she gets frisky, she can just strip that skirt off!
All three sit outside to pose for a picture.  I must admit to being slightly attached to these three.  I hope you don't regret coming for a visit.  I am sure the ladies at Inspiration Cafe wondered if I would ever shut up, but I am Southern - when we have something to say, we just talk and talk and talk and . . .

Well, you get the picture.  If you ever have the time, come over and visit.

See y'all!


Thanks Donna!
 
Happy Monday Everyone,
Sherry
Continue Reading ...

1/1/12

Family Name Established Sign ~ Old Windows


When my husband told me he was bringing home a bunch of these old windows, I seriously thought he had gone loco en la cabeza. 
But he said he had a vision for them.

This time it was him reassuring me of  the possibilities..the vision
I was the one waiting to see if he could take the image inside of his head, and create something new and valuable out of something discarded and unwanted.
He took this window outside and sanded off the numerous layers and colors of paint...so much history! 
Then he cleaned it up with a fresh coat of white and did a bit of distressing.  Simple.  Clean.
He added loop bolts to the top and then some chain for hanging. 

Why do I love the old, crusty hardware so much? 
I forgot to mention that he sprayed the chains and loop bolts with some metallic, oil-rubbed bronze spray paint, before attaching them.

Now it was my turn.

I cut out a surname and "established year", (this being the year of the recipients' wedding), on my die-cutting machine and applied the vinyl to the glass ~ being careful to get it centered and level. 
I did uitilize a couple of tape measures in this process...not rocket science.

The vinyl I used is a deep brown...it goes with the oil-rubbed bronze quite well.

This was an anniversary gift and the recipients have a wonderful covered, wrap-around porch that we were envisioning it hanging from. 

I can't wait to see it hanging at their home...next time we visit.


We already have three more requests for these...it won't take us long to use up these old windows! 

It looked really nice hanging from OUR front porch.  It is apparent that we need to make one with our name and wedding date also.  

We already have our fair share of white around here so maybe a hint of color...  Although, a nice black frame would like good too.  Hmmm, a pop of color...or something more subtle?  We'll have to paint a couple of these in various shades and see how they look.


What a great personal touch to an outdoor porch or entry.  The vision turned out very classy.  ;)

UPDATE:  Here's our very own Family Established Sign in pale grey-green!!!
Continue Reading ...

12/17/11

Serving Tray Tutorial and a Hot Chocolate Station

Our very own HOT CHOCOLATE STATION!!!

BUT...
 Before this HOT CHOCOLATE STATION was possible I had to create the perfect serving tray.  I love trays.  They make nice little vignettes on your counter or tabletops when combined with a few accessories.  And it's so easy to move them to another location if you end up needing the space.  They can be coordinated with the colors and style of any room.  You may have seen my first serving tray here.  These trays started out life as unfinished oak cabinet doors.  We were lucky to find a bunch of these doors being sold at an amazing price and of course we snatched them up.  So many possibilities!

I decided to finish this tray in a distressed black, so I gave it a couple coats of semi-gloss black paint and let it dry.  Then I started my search for the perfect words or saying.  I quickly settled on Galatians 5:22-23.  Isn't it nice!?  So I went to work printing my version of the quote in several different fonts.  I decided against cutting these words on my Cricut...either in vinyl or card stock.  Because of the thin, small letters it would have been a disaster trying to cut, arrange and adhere all of these letters.  Instead I printed up my words in the text size I wanted, then I placed the words where I wanted them on my board:


I traced over them with a ball point pen and heavy pressure.  This left slight indentations of the words on the board.  SEE:

Please forgive the flash glare!  I wanted to make sure I got a shot of the words traced into the board.  You can see them if you look closely.

It took a few LONG minutes to get all of the words traced onto the board.  My hand was a bit achy from the pressure I was putting into it! 

At this point, I was going to get out a very fine point paintbrush and some white craft paint, but I remembered the white Pen-touch Fine Point Paint Pen I got for writing on photographs.  I think this was a lifesaver.  I'm having a hard time imagining painting all of these words with a tiny little paintbrush.  I only wish the Pen-touch could have written a tad bit finer.  Either that or I should have done a slightly larger text size!  Although I didn't want to have the text overpower the tray.


Here's what it looked like once all of the text had been gone over with the white paint pen:

Not perfect, but I'm going to rough it up a bit anyway.  I don't like having things looking too new and "perfect" around here.  With all of the kids and activities that go on, I would be a wreck worrying about things getting messed up!

You can believe that at this point my hand was EXTREMELY ACHY.  I do believe it was stuck in a writing position for the rest of the evening.  Sigh...the things we do for our creativity...

After the text was finished I pulled out one of those sanding sponges and distressed the corners, edges, and even roughed up the top a bit where the text is. 

All there was left to do was add my accessories and ingredients for the HOT COCOA STATION:
(The dishes and accessories were all taken from other areas in our home.  We were able to create this without the purchase of any new accessories.  Yay for shopping your own home!!!)
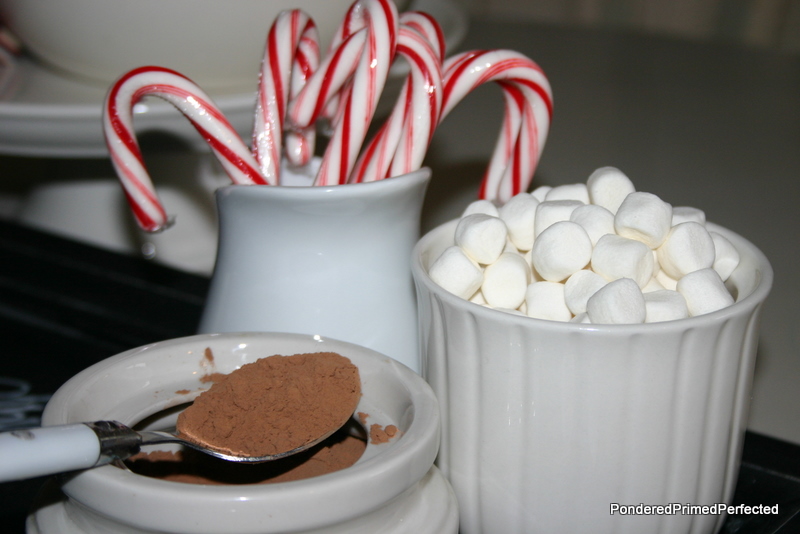
Cocoa, Mini Marshmallows and Candy Canes!  Mmmmm...


Then came some fun Christmas Mugs:
I added in my little Santa Bell...he just seemed to go here. 
I swear, you'd think Starbucks pays me!  Quite the opposite, I tell you.


Our Snowman Cookie Jar:
I LOVE this guy...he holds yummy surprises  :)
 So here is my newest tray, with an inspiring quote, finished with some distressing and white ceramic and silver pulls as handles.  All ready to offer up some hot chocolaty goodness:


My kids are sooo going to love this!  I can't wait for them to see it.


I cannot take complete credit for this idea.  Although the designing and creating of the serving tray was all my own and my accessories are completely different than any others I've seen, I was inspired by Someone Else's hot chocolate station.  Creating our very own HOT CHOCOLATE STATION has been on my to-do list since I spotted a darling little cocoa space created in the kitchen at Sweet Something Designs. You'll have to go take a look at Michelle's house all decked out for Christmas and see what else she's been up to.   Michelle has a beautiful design style and her blog is well worth the visit.  :)   Just click the link here  to open Sweet Something Designs in another window.  Maybe even leave her a message and tell her Sherry from Pondered Primed Perfected sent you.  ;)

 Enjoy a sweet treat with your loved ones today,
Sherry

Sharing with:
Folk Blog

Continue Reading ...