-
Showing posts with label glaze. Show all posts

7/28/13

How this pair of washed out, homeless, 'down on their luck' nightstands got a second chance at life. A tutorial.

These nightstands have been waiting for a second chance at life.
...and waiting...
...and waiting...
But I started a new job just a few weeks ago and everything changed.  I haven't had any spare time for makeovers or ANYTHING extra really. 

Then something amazing happened this weekend ~ we didn't have ANYWHERE to be so I got to stay up late...
...and sleep in...
...and work on these beauties!

Hurray!

They've come a long way.

But you need to know haw far they've come to appreciate their journey.
They were sad little boxy nightstands left abandoned on a Portland side street when we found them.   They had NO LEGS.  
One of them had a sticker on the back that said 'Pair of oak nightstands $640.00' so apparently they were something special back in the day.  But when we found them they just had a crooked piece of lined notebook paper taped to the front of one aged door reading 'FREE'.  

Seemed like a good challenge to me.


It never ceases to amaze me what a little paint and elbow grease can do to transform old furniture.  For this little duo I went with a Dutch Boy paint & primer in Cathedral Grey.


First I removed the hardware and doors then sanded them down inside and out.  Then I gave them a good wipe down with a damp cloth to remove all dirt and sawdust.  I applied a couple coats of Cathedral Grey with a paint brush, letting them dry completely between coats.


I'd found these wooden legs at Goodwill and bought them when I was planning to make an ottoman but then I didn't need them (you can see how I made that ottoman HERE) so they came in handy for one of the tables.  We just went to our local Builder's Supply store and bought four more.  There were other types of legs but I like the 'retro' look of these to go with the older nightstands.


We also bought the metal pieces that attach the legs to the base of the nightstands...


The metal brackets get screwed to the table and the legs screw into the brackets.  Easy!


They were looking good with the new paint color but they certainly couldn't go around with those bare legs showing.  How inappropriate!


I taped over the brass ends before painting then stuck the legs upside down in a cardboard Nike box to dry.  The same box was used to hold the hardware while being painted.


The shiny white hardware may be my favorite part about this duo.


Then again the way the white glaze brings out the detail on the doors is pretty nice too.

The glazing gave them so much more depth...and the cute little legs gave them the height they needed to work in our space.


And WOW do they work in our space!


Free Nightstands
$1.00 jar of paint from Habitat for Humanity.
$20.00 wooden legs and metal attachments.
Glaze, white paint and white enamel spray from our stock.


That's $21 dollars to beautiful!!!


Have you ever found furniture on the side of the road that was just begging to go home with you?  I would love to hear about it if you did.


Continue Reading ...

11/20/11

Dining Set Makeover...When Will I be done???

ALMOST DONE!!!  I'm so impatient I had to stop and take some more pictures of my progress. 

BEFORE:

AFTER:


Some wax and a couple coats of poly and I'm calling it good.  I want to move on to some NEW projects.

Hope you are having a productive weekend...or a relaxing one...whichever you prefer!?

Continue Reading ...

11/14/11

From Old to New to Old Again


What a busy weekend. 

I spent hours putting a second and third coat of paint on the dining chairs and table.  Sunday morning I could barely get out of bed, I was so sore from all of that stooping, squatting and bending down.  So everything (except the table top) got a couple coats of fresh white paint and they look stunning!  I decided to add another coat of paint to the doors of my craft cabinets while I had the paint supplies out.  Check out my poor floors!  They are really taking a beating with all of this indoor DIY activity.  (Don't tell the hubby but I'm secretly hoping to paint or in some way refinish those floors someday.)  The floors were recycled from a family members remodel that my husband helped with, by the way.  I don't have NEW wood floors in the budget, but I have to tell you ~ I have a strong dislike for wall-to-wall carpet, especially of the off-white or light beige family.  What can I say?  I run a preschool in my home during daylight hours and children are tough on carpetingWho knew???  

Okay, back to the table...

Here she is after several coats of white paint have been applied
 And here is a look at the set with the chair cushions on.  Isn't she pretty?  (And My Honey got the doors put back on the craft cabinets while I was out shopping for glaze...HE'S SO AWESOME!)


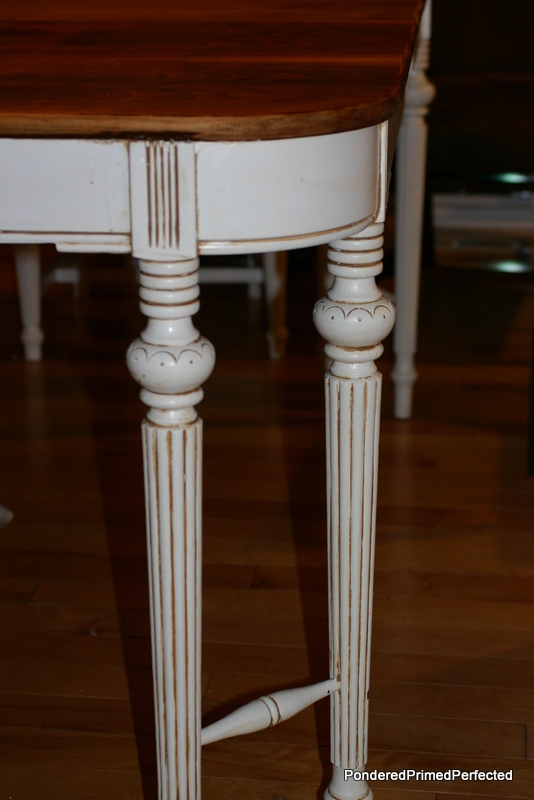
And a close up of the detail on the table:

Check out that walnut tabletop.  That makes my Handyman happy!

White is nice but I wanted to give the table some real character and also find a way to tie the white of the table legs and the chairs to the gorgeous color of that walnut tabletop.  So, I have ventured out into that dangerous unknown territory of glazing.  I watched a tutorial that I found online and I was ready to go.  The glazing process is pretty simple.  You just mix a cup of glaze with two tablespoons of acrylic or watercolor paint and stir.  You apply the glaze to your painted surface and then wipe off the excess, leaving the glaze inside the cracks and crevices to bring out those details.  Pretty simple!  I still have half the table and five chairs to finish glazing but hopefully I can conquer some each evening this week.  I am extremely pleased with how this dining set is shaping up.  My man even said he really likes what the glaze does to the overall look of the table.  Of course he is a big natural wood fan...good thing I'm leaving that tabletop unpainted, huh. 

Look at how those details POP now.


 Hope you have a fun week and find time to work on some projects of your own.

Enjoy your projects!
Sherry


Continue Reading ...